Google Shopping is one of our favorite ecommerce marketing platforms. It gives retailers access to millions of shoppers, but also provides tons of controls to refine audiences for highly targeted campaigns.
Getting started, however, can seem daunting even to seasoned digital marketers. The main culprit for this confusion is the multi-leveled entry process. Before you can start selling on Google Shopping, you'll need to activate accounts on two distinct platforms: 1) Google Merchant Center and 2) Google Ads (formerly Adwords).
You'll need a Google login for this. Most people use a gmail account to manage this entire structure. If you go that route, you can choose to either use your personal gmail or to create an account specifically for use with this account, i.e., mycompany@gmail.com. Some people prefer this format because they're able to share it with other team members for access.
Once you've established your account access protocols, you can either jump right into it, or you can establish optimized processes for your campaigns from the start. We prefer the latter, and the way we do it for our customers is by using an all-in-one Google Shopping solution (shameless plug, sure, but facts are facts) that allows us to:
- Filter what products get included in Google feeds
- Create rules to automatically optimize PLAs
- Validate feeds before submitting to Google
- Set up import and feed schedules
- Be alerted whenever there's an error
- Get help from Google feed experts when fixing errors
Getting Started with Google Shopping
Merchant Center Setup
The process of mapping a feed and assigning the correct product category for Google’s taxonomy doesn’t have to be a harrowing experience.
What I find is that the sellers who try to do this manually or with a shopping cart-to-Google app, tend to get discouraged by the high number of feed errors and warnings. Then, after a ton of work to get this sorted, their feeds are still just good enough to pass compliance. Not good enough to compete.
Submitting Products to Merchant Center
We recommend using a trusted Google Shopping integration that allows you to modify incoming product data at scale.
To set up a Google Merchant Center feed, Google and GoDataFeed have provided documents outlining the process:
The step-by-step process of submitting your feed will differ by the method you’ve chosen.
Manual submission
This requires that you have a flat file (csv, txt, xml) of your product data. You will submit by uploading that file into Google, scheduling a fetch or by placing it into a Google Sheets page that Merchant Center can access.
This has obvious drawbacks.
For one, the data being submitted will be static. You’ll have almost no ability to manipulate attributes.
And there’s also the issue of limited submissions. Once daily is the most often your data will be pulled. That’s just not enough to keep your data and inventory fresh and accurate.
Content API (aka shopping cart-to-Google apps)
The Content API for Shopping allows apps to interact directly with the Merchant Center platform, vastly increasing the efficiency of managing large or complex Merchant Center accounts. The Content API for Shopping can be used as an input source for product data in Merchant Center, directly delivering your data as it is updated on your site.
This is a much better option for data freshness and inventory accuracy. But it still has drawbacks.
The main problem with this is that it’s little more than a highly efficient data dump. Whatever is on your store is what gets pushed into Merchant Center. Again, you have very little control over how your product ads are presented.
So what’s the better option?
Product Feed Automation Tool
You knew it was coming. Here it is. Product feed automation tools not only simplify the Merchant Center integration (like Content API) but they also add a layer of data controls.
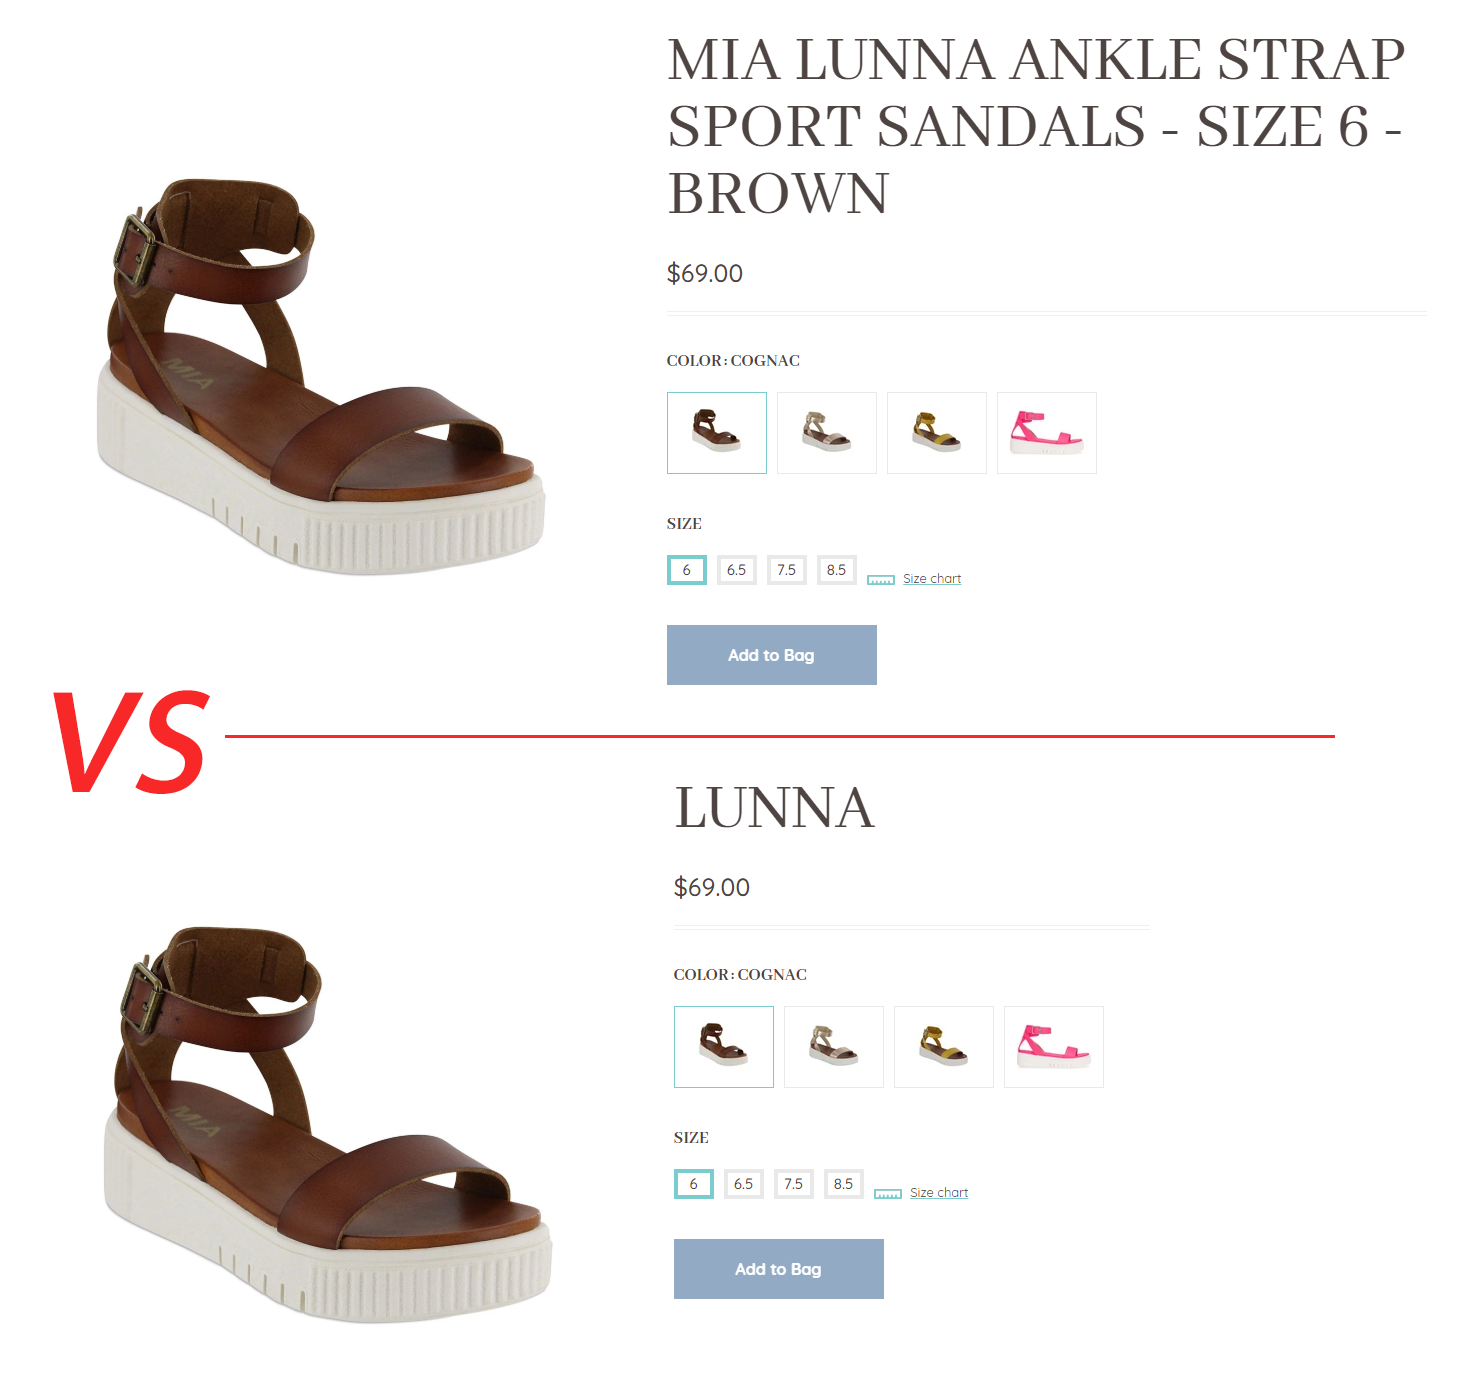
With product feed automation tools you can create custom attribute templates. What do we mean by that? Here’s an example… If you’re a shopper looking for size 6 strappy red sandals, what’s a better product ad title?
1) Lunna or 2) Women's Mia Lunna Platform Ankle Strap Sandal, Size 6 M - Red
Option 2 is obviously the richer product ad title.
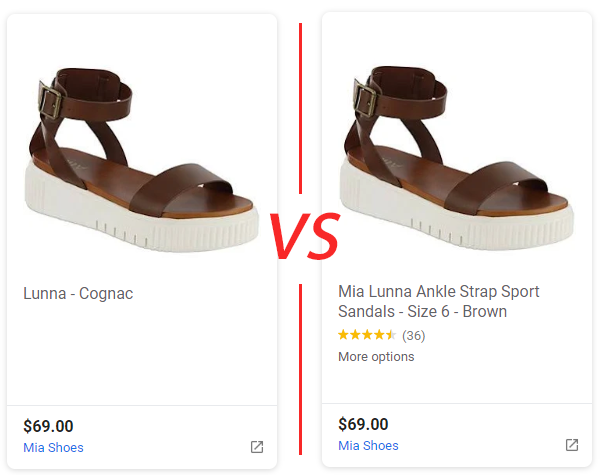
But you wouldn’t want that as your product page title. That’d be really long and too specific. Which is why you DO NOT want to push your store data -- UNMODIFIED -- into Merchant Center.
Maintaining a Healthy Feed
Once you have completed the steps outlined to submit your Google Shopping feed, Google will take a few days to approve it.
Make sure to monitor the health of your feed. Check in regularly to ensure you have no errors or warnings that would prevent your products from being listed. If you are submitting manually, you can do this on Merchant Center.
If you use GoDataFeed's Google feeds, the app will monitor your feeds and alert you if issues arise, but it's still good advice to log in occasionally to assess feed health.
Launch a Shopping Campaign on Google Ads
Google Ads is the backbone of the Google Shopping program. Unlike traditional ads on Google Ads, Google Shopping uses Product Ads. Product Ads do not require keywords, but do require a connection to your product feed.
While you can create Product Ads in any existing campaign, for maximum control on your ad spend, I recommend creating a new campaign.
How to Create a Shopping Campaign
Before you can launch a campaign, you’ll need to link Merchant Center to Google Ads. Do that now if you haven’t already done so.
In your Google Ads account, click on All campaigns in the left menu. Then select the Campaigns tab. Finally, click the blue plus icon. This will open the Select campaigns settings page.
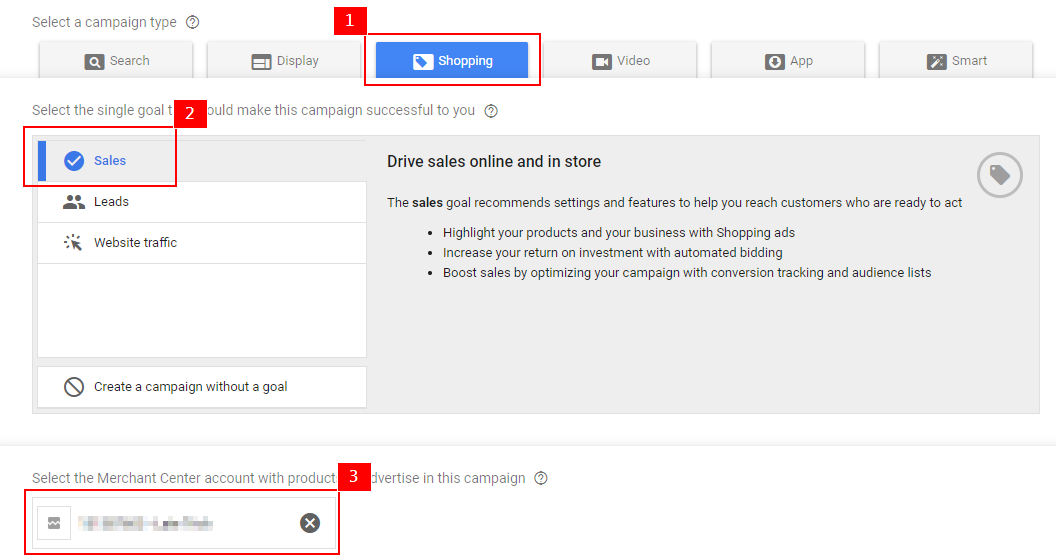
Getting started:
- Select the Shopping campaign type
- Choose Sales as your goal
- Make sure the correct Merchant Center account is selected
- Choose between Smart and Standard campaign types
- Click Continue
This will load the Set up ad group page. Here, you'll:
- Name your campaign
- Select a bid strategy
Selecting a bidding strategy:
- Target ROAS - Sets bids to help you get the most conversion value while maintaining your target return on ad spend (ROAS).
- Maximize clicks - Sets bids to help you get the most clicks within your budget.
- Enhanced CPC - Adjusts your manual bids up or down to help you increase conversions.
- Manual CPC - You set your own maximum cost-per-click (CPC) for your ads.
Setting up your campaign:
- Set your daily budget - A common trick here is to figure out how much you want to spend per month and divide that number by 30 to come up with your daily budget.
- Select a campaign priority - This will decide what campaign appears when multiple campaigns match a search query. If campaigns have the same priority, the campaign with the higher bid will serve.
- Set your targeting & scheduling settings
- Save and continue
This will load the Ad group refinement page, here you'll:
- Pick your ad group type
- Product shopping ads shows a single product at a time.
- Showcase shopping ads let you group together related products and present them together in a single ad
Finally, it's time to create your ads:
- Name your ad group
- Enter your bid
- Select the product groups you want to promote with this ad group. We recommend having a “catch-all” group with minimal “penny” bids that include all products along with segmented groups that target products based on similarities like price point, category, margins, brand, etc.
If you chose Product shopping ad types, this will launch your campaign. If you chose Showcase shopping ad types, this will load the Create an ad page.
Setting up your Showcase shopping ads:
- Enter the final URL. If you are setting up a catch-all ad group, we recommend entering your store’s all products page URL. If you're setting up a segmented ad group, we recommend putting in that collection’s URL.
- Enter a display URL. This is really just a vanity URL. It’s what the shopper will see. For example, if your final URL is https://www.mystore.com/running-shoes, your display URL might be mystore.com/running.
- Enter a cover image. Dimensions: 1200×628, max file size: 5120KB
- Give your ad a Headline (24 characters) and a description (120 characers)
- Name your ad
- Save and launch


Bryan Falla
Bryan is a digital marketer with roots in journalism and creative writing. Over the past decade, he's helped hundreds of online retailers develop and implement ecommerce marketing strategies. When he isn't educating retailers on ecommerce, he's out exploring South Florida and stalking local breweries.


.png)
