
Let’s face it, traditional brick-and-mortar shopping is not what it used to be. In fact, 8 out of 10 customers are less likely to go to a store if they can’t view available inventory levels online in advance. So how are you supposed to compete in a world where ecommerce and in-store shopping experiences are intertwined? Enter Google Local Inventory Ads.
Google Local Inventory Ads: What & Why
Winning the local product search battle comes down to being visible when local shoppers search for your products. When customers don’t know that you have the products they want in stock and nearby, it’s easy for them to turn to a shipping giant like Amazon or Zappos instead.
Google Local Inventory ads give online shoppers a way to easily identify products available in stores near them. These ads create an omnichannel experience for shoppers and merchants alike--promoting inventory in brick-and-mortar locations through the local inventory ads.
Say you are on the way to a weekend lake getaway and just realized you forgot your flip flops. You simply take out your mobile device and type in “womens flip flops near me” and a list of stores with available flip flops pop up.
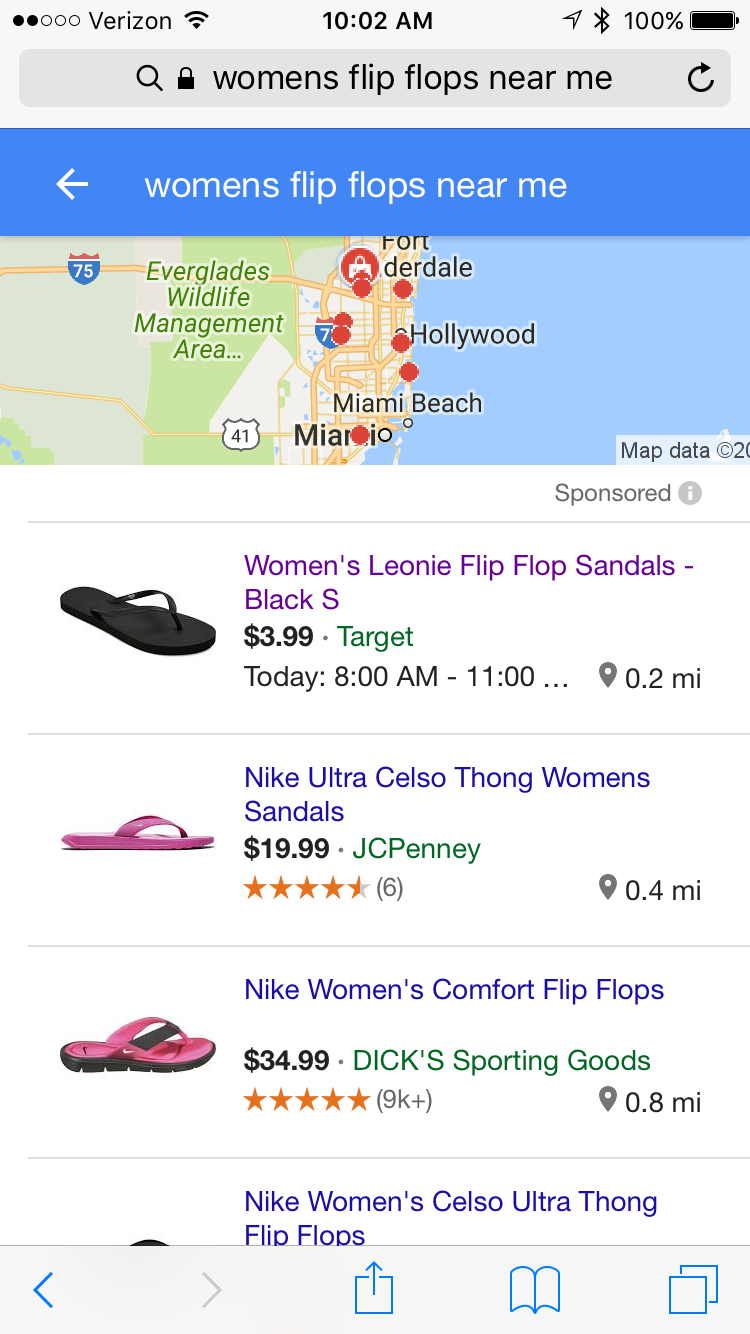
When you click on the ad, you are brought to a Google-hosted web page of the store (known as the local storefront) which not only provides you with the flip flops available but also the distance to the brick-and-mortar location and even the store hours.
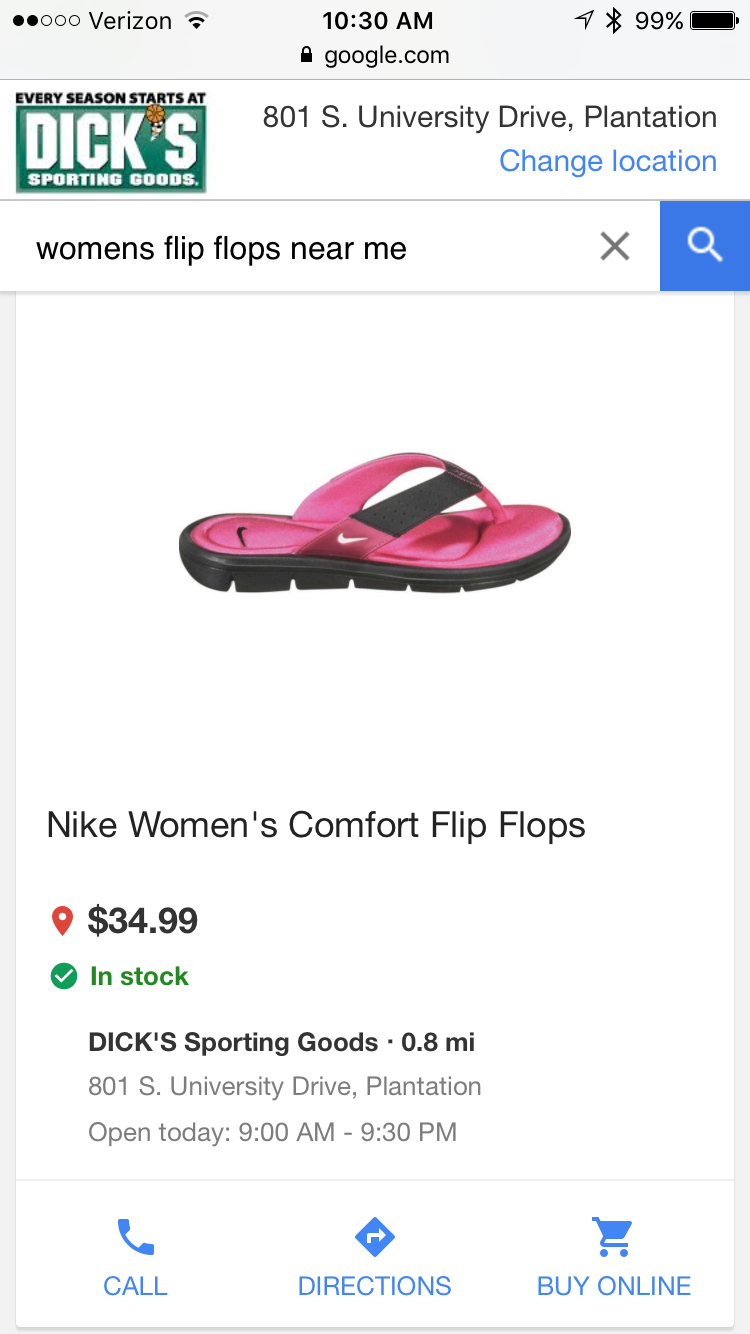
Your shopper drives to the store, picks up the desired flip flops and heads out to the lake... And that’s an omnichannel shopping experience at its finest.
The Local Inventory ads are displayed to searchers who are in a reasonable driving location. And,no, you can’t change the radius for which your ads are displayed. It’s all based on geo-targeting.
Who is Eligible?
According to Google, in order to qualify for local product ads, you must meet the below requirements.
- Own a brick-and-mortar store that is open to the public
- Sell physical goods that shoppers can buy without an additional purchase such as a membership
- Have a store physically located in the country that you are targeting your ads to
- Protect customers personally identifiable information (PII)
As of right now, inventory ads are only available in the U.S, U.K., Germany, France and Australia.
Getting Started With Google Local Inventory
Now let’s get to the part where you learn how to list your products. While Google provides you with detailed instructions in their Help Center, we’ve highlighted some of the important aspects below.
Step 1: Fill out the Interest Form
The first step is to let Google know you are interested via the interest form. Once Google has reviewed your form, they will contact you.
Step 2: Configure your accounts
In order to run local inventory ads, you must have the following accounts set-up:
- Merchant Center: If you already are advertising through product listing ads, your merchant center account should already be setup. If not, then you’ll need to create an account. Also, you need to upload your business logo to the Merchant Center account.
- Google My Business Locations: Create a Google My Business Locations account where you will supply information about your stores. With Google My Business locations, you submit a unique identifier for each store known as a store code. Be sure to know your store code when you go to create your local feed.
- AdWords Account: Again, if you are already using product listing ads you probably have your adwords account set up and linked to your merchant center account. If not, do so.
Step 3: Build and Submit your Feeds
Required Feeds for Google Local Inventory
Unlike Google Shopping PLAs, Google Local Inventory requires that you set up 4 different feeds. Because you're dealing with in-store shoppers making the trip to your store as a result of the information provided in these listings, managing these feeds so that inventory levels and product information is up-to-date and accurate is an absolute necessity.
Here are the feeds required for Google Local Inventory:
- Google Shopping feed: This is the standard product listing ads feed
- Business information feed: This feed contains information about your stores and is submitted to Google My Business
- Local products feed: This feed contains a list of the products available at each location
- Local product inventory feed: This feed provides price, availability, price and location-specific product information
Local Products Feed
This feed should contain all products that you sell in your physical store. Check out Google’s local product feed specs for a full list of required and optional fields for the feed.
Required identification attributes include itemid and title. If you don’t already have an online products feed, be sure to include description, image_link, condition, gtin, brand and google_product category for all products in your local feed. If you already have a product feed, the attributes are required for the products sold only in stores.
If you need to match items across your product feed and local product feed, Google recommends using the same value for ID in your products feed as itemid in you local products feed. If that’s not possible, other matching attributes include:
- Matching webitemid in your local feed and ID in your product feed
- GTIN of the item
- MPN of the item
- Brand of the item
For those selling apparel products, your feed may require additional attributes, which can be found in the feed specs.
Local Product Inventory Feed
Required inventory details for this feed include the store code (your store identifier from Google My Business), itemid, quantity and price. For a list of all attributes, take a look at the feed specs.
If you have frequent price and availability updates, we suggest sending your main local products feed once per day and sending local product inventory feed multiple times throughout the day.
Once your feeds are built, you must register and upload the feeds to Google.
Building and constantly maintaining these feeds are a lot of work. If you don’t have time to build out these feeds or are just looking for a more automated process, Google Shopping services like GoDataFeed’s can build the feeds from start to finish on your behalf. Our feeds synchronize with your shopping cart platform, ensuring that your product information is up-to-date and allow you to easily select which products to include in the feed.
Step 4: Complete Google Inventory verification checks
In order to implement your ads, you must have a Google representative complete an inventory verification visit to a small number of your store locations.
Step 5: Enable ‘Local’ in shopping campaign
Within AdWords, select the shopping campaign that you want to use for your local inventory ads. Then, go to Settings > Shopping settings (advanced) and check the “enable local inventory ads” box.
Additional Features of Local Inventory Ads
Google also offers some cool optional features that merchants can choose to take advantage of.
On display to order (ODO)
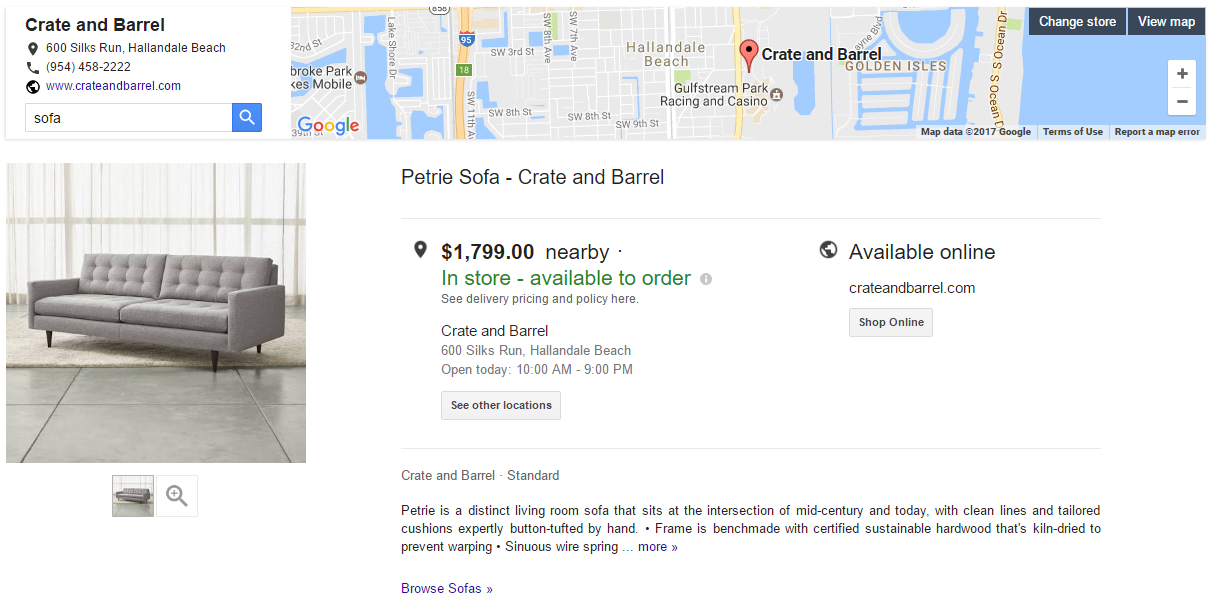
If you’ve ever gone furniture shopping, it’s likely that you’ve ordered an item you saw in stores that wasn’t available for immediate purchase and you received it at a later date. This is where ODO comes into play. It allows retailers to advertise the items that are displayed in-store, but not available for immediate purchase.
Store Pickup
If your items are available for store pickup and you have this feature enabled, a merchant who is on your Google local storefront page will see a link to your site that has store pickup info. By clicking the link, the shopper will be taken to your website where they can complete the order using the store pickup checkout option.
Merchant hosted local storefront
With this feature, shoppers who click on your local inventory ads are directed to your website instead of your Google-hosted local storefront. Learn more.
Online conversion from local inventory ads
This feature allows you to track users that click on your local inventory ad and convert online as opposed to buying at one of your physical store locations. Learn more.
Tips for Success
Google Local Inventory has helped local brick-and-mortar stores by finding the customers looking for products nearby, but just signing up for Google Local Inventory isn’t enough.
Here are some tips for making the best use of your Google Local Inventory ads:
- Upload frequently. This cannot be stressed enough. Local Inventory products should be updated daily and product inventory at least once a day. You’re not going to win customers if they come in for an item that’s out of stock.
- Understand the different product offerings. Product Listing Ads and Local Inventory ads serve very different ends. Product Listing ads are intended for products that will be sold exclusively online, where Local Inventory ads are for products you intend to sell in-store.
- Know that ads will appear slightly differently on different platforms. It might not seem like a big deal, but your ad can scale differently on different platforms. On a desktop, customers get much more complete information on the main Google page. In order to be mobile-friendly, you want to present your most informative and clear images up front. The local storefront is very different, so always test your ads on both a desktop and mobile device before making them live.
Conclusion
If you are looking for a way to bridge the gap between brick-and-mortar and online shopping, look no further. By promoting your in-store inventory online, you get your products out in front of shoppers searching locally to, in turn, boost your in-store sales. Google local inventory ads are a potential game changer in the way you can advertise to shoppers. Don’t miss out on the opportunity to create an omnichannel experience for your customers.

Nicole Santoro
Nicole is an ecommerce specialist who works with hundreds of Amazon sellers and Google merchants across various industries to optimize and update their product listings and data feed campaigns. In her spare time, she enjoys traveling, soaking up the rays in sunny South Florida and reading thrillers while curled up with her dog, Hamlet.
%20).webp)

%20).webp)